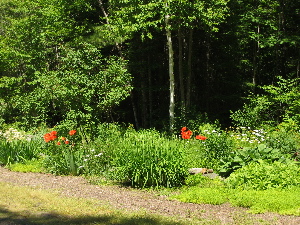
Saturday, June 25, 2005

So Much For Xeriscaping!

Well, I won't do THAT again! I got NO responses from that page...I guess no one is interested in saving water!!!
Talk about saving water, my bearded iris' and the poppies rotted from all the rain we had over the past few weeks. Not the roots or rhizomes, but the buds. Just rotted! YUK. I hope they'll be OK next year. I would guess they will be OK. I think I'll just cut off the rotted buds down to about 6 inches from the ground. that way the rotted stuff won't travel below the soil.
Now it's SO hot that it's downright unsafe to work in the garden, so it will continue to look a bit ragged. That's the way it goes folks. My garden has to fit MY lifestyle. I'm hoping I won't be one of those folks who die while gardening. They would say afterwards, "Well, at least we know she died happy-in the garden." Sorry, I'd rather be alive and NOT die in my garden!!!! :-)
So, what can I tell you? Make a comment or ask a question below, and I'll respond.

Tuesday, June 21, 2005

XERISCAPING YOUR GARDEN

OK...just WHAT is xeriscaping? Xeriscaping is pretty much defined as growing plants that are drought-adapted while using water saving techniques. As a lazy gardener...this is my idea of the perfect garden. Just plant, water to get the plant established, stand back and enjoy! UMH...did I say weeds are also relatively drought-adapted? I guess it wasn't exactly perfect in every way, was it? Oh, well. ALMOST perfect! You won't have to water NEAR as much. And if you add lots of mulch, even the weeds will be kept at bay. The mulch will also help conserve any water that does fall on your garden.
Try visiting this web site at the NH Department of Environmental Services. It is an entire page on how to go about xeriscaping your garden. However, I will give you you their list of plant materials that will work quite well in a dry situation, in our climate. This means you will use less of your water resources, as well as making your garden easier to handle.
When you choose plant materials to add to your garden, try seriously to work some of these into the plan. You will NOT regret it!
My garden is quite far from a hose, so it really has to depend on the water sent from the heavens. Xeriscaping therefore, really appeals to me.

The following is a list of plant materials (from the NH DES web site given above) well adapted for water-wise landscaping in New Hampshire.

Ornamental Grasses:
Alopecurus pratensis, Foxtail grass, Zone 4
Deschampsia cespitosa, Tufted Hair Grass, Zones 4 & 5
Molina arundinacea, Purple Moor Grass, Zones 4 & 5
Phalaris arundinacea, Ribbon Grass, Zone 4

Trees and Shrubs:
Acer negundo, Box elder
Cotoneaster spp
Crataegus spp., Hawthorn
Juniperus spp, Junipers
Kalmia latifolia, Mountain Laurel
Prunus Americana, American plum
Rosa Rugosa, Beach Rose
Syringa spp, lilac

Perennial Flowers
Achillea spp, Yarrow, Zone 3
Asclepias tuberosa, Butterfly Weed, Zone 3
Baptisia australis, False Indigo, Zone 3
Coreopsis spp, Zone 3
Dianthus plumarius, Grass Pink, Cottage Pink, Zone 3
Echinacea purpurea, Purple Coneflower, Zone 3
Gypsophila paniculata, Baby's Breath, Zone 3
Hemerocallis spp,Daylily, Zones 3-4
Perovskia atriplicifolia, Russian Sage, Zone 5
Rudbeckia spp., Black-eyed Susan, Zones 3-4
Sedum spp.,Stonecrop, Zones 3-4
Stachys spp, Lamb's Ears, Zone 4

Annual Flowers
Cleome spinosa,Spiderflower
Coreopsis tinctoria
Euphorbia marginata,Snow-on-the-Mountain
Gailardia pulchella,Blanket Flower
Helianthus annus,Sunflower
Portulaca grandiflora
Tithonia rotundifolia,Mexican Sunflower
Salvia farinacea,Blue Salvia

Monday, June 20, 2005

Moose "On the Loose" -- Drivers Beware!

Here is an article put out by the New Hampshire Fish and Game folks. It's surely worth paying attention to on the northern highways of New England.


Moose "On the Loose" -- Drivers Beware!

CONCORD, N.H. -- It's nearly summer and, as is always the case at this time of year, increased reports of moose sightings and moose collisions in New Hampshire have prompted wildlife officials from Fish and Game to warn motorists to take extra care while traveling Granite State roadways.

Yearling moose -- those that were born last spring and summer -- are on their own for the first time, having been pushed away by their mothers (many of whom are now calving again), and the youngsters are apt to show up just about anywhere and at any time.

Wildlife biologists urge motorists to slow down, stay alert and use extra caution throughout spring, summer and fall. Wandering moose of all ages can be seen anywhere in the state, including on the roads, and certainly not only at "moose crossing" signs!

To avoid a moose collision:

  • Drive below the speed limit -- especially at dusk and dawn and especially in moose-heavy areas;
  • Use high beams when possible;
  • Be able to stop within the zone of your headlights;
  • Scan the sides of the roads as you drive.

More than 200 moose are struck by vehicles each year in New Hampshire, according to biologists and law enforcement authorities. New Hampshire has an estimated population of 5,000 to 6,000 moose.

To spread the word about sharing the roads with moose, Fish and Game created "Brake for Moose," an award-winning campaign that includes the popular yellow bumper sticker and highway signs. As the signs say:

Brake for Moose, It Could Save Your Life!

Sunday, June 19, 2005

MOOSE!

I really think the moose has been here, checked out the hosta...and ATE it!
I've GOT to get some photo's on this page!
A few weeks ago, I looked up from the breakfast table and saw a MOOSE at the foot of the driveway. As soon as I got back with the camera he was of course, gone...or at least behind some trees where a photo wouldn't get him at all! I thought no more of it, except that it was a bit of an adventure.
Then we returned home after being gone a bunch of days, and my hosta were looking like a green, leafless SHELF! If deer nibble at the hosta, it looks nibbled; there are leaves torn off, it is eaten down to nubbins, but it's UNEVEN. This was ALL the exact same level. I think it was the moose!
So, I ran to the garage and broke out the Milorganite. Now, I know that some gardeners are SHOCKED that I use this at all. some consider it "sludge". And, it IS made from sludge generated in Milwaulkee...thus Milorganite. But, the deer HATE it! I usually sprinkle it around my garden a few times during the growing season, and although the deer move through the garden, they never eat my plants. SOOOOO, do you think moose don't like it either? Stay tuned, and I'll let you know how the Hosta fares!
What is nice about Milorganite is that it is a fertilizer, so it really IS good for the garden. For this use, I make sure it's on the leaves as well as the ground. In fact, that's where I want it. It doesn't seem to burn the leaves, so I'm happy. I would NOT use it in a vegetable garden, because it might have "nasties" you don't want to eat. I guess the deer read that information as well as us. I'm happy they do, because I don't like them using my garden for their tossed salad!!!

Monday, June 13, 2005

Plan for color all summer!

So many gardeners fall in love with Rhodies and Azaleas. They ARE beautiful, but remember they only bloom for a short time, and then they are green for the rest of the year. Green can be boring in a garden, unless you REALLY work at it! Not only that, these shrubs can become huge, taking up an inordinate amount of space. So, use a few, but don't get carried away. If you really want shrubs, look for ones that bloom at different times. Try Mountain Laurels, Viburnums, Potentillas and Hydrangeas to add to the mix. There are so many beautiful blooming shrubs, if your space is large enough. Then in beds between them use perennials.
Check out catalogs that tell you WHEN the perennials bloom and what COLOR they are. As one set of blooms fade, another takes over. THAT's what makes your garden a joy, to say nothing about INTERESTING! Also, be sure to add some annuals. They retain that color for the entire summer and once planted are pretty carefree, except for dead-heading (removing dead blooms).
Be sure those colors that are planted close together compliment each other. Orange and red are sure interesting, but planted together, they can give you a color headache!
I'm off on a short vacation so I won't be posting for the better part of a week. Don't overdo out there...it's HOT!

Any questions for me?

Wednesday, June 08, 2005

Cultivation of Bearded Iris

I had a question about separating Bearded Iris in the last posting. I thought I’d do an entire post on Iris in case others of you had questions as well. So, here we go!

Bearded Iris are among the most delightful perennials I can imagine! They are beautiful and relatively easy to manage.

As you think about where to place them in your garden, think “SUN”. They love to be in full sun. In warmer climates they appreciate a bit of shade, but the last time I checked the North Country, we didn’t fall into that category! The rhizomes are healthiest if they are exposed to sunshine and air. Whenever I transplant Iris, I separate them and lay those rhizomes on a sunny rock for a day or two to completely dry out before replanting them. They seem to really appreciate the sunbath.

When you put them into the ground, leave them a bit exposed. If your Iris do not bloom, check to see if you can see the surface of the rhizomes, if you can’t see them, scrape off the dirt and I can almost guarantee you will have better bloom.

In our area, Iris should be separated after they bloom. Depending on the variety and your own climate, which could be either July or August. The reason for this could not be easier. ENJOY the flowers, THEN dig them up and separate them as soon after flowering as is convenient. Remember they need to be established before frost. I would suggest that you finish up with this chore before mid-September.

They will eventually get crowded and should be separated every 3-4 years. So, take your gardening fork and dig up the whole clump. Check EVERY rhizome for softness or rot. If there is any rot, ruthlessly cut it out, and discard it in the GARBAGE, NOT THE COMPOST. You don’t want to put borer’s or disease into your compost!

Separate all the rhizomes, discarding the old and saving the new and healthy ones. Lay them on that sunny rock and let them dry out. While you’re waiting for that to happen, begin to prepare the hole(s) for replanting.

Dig a hole larger than the spread of the roots. In the center of the hole make a kind of hill of soil, so you can put the rhizome on top of it and drape the roots out and down the sides of the little hill. Always pack the soil firmly around the roots after planting and water thoroughly. They can be planted between 10 and 24 inches from each other. The closer they are planted, the sooner you’ll have to go through this exercise again. However, close planting will give a great display. I guess it boils down to how much time you want to devote to separating Iris!

As far as the soil is concerned, Iris like their soil neutral and well drained. However, when you plant them you can add bone meal, or super phosphate directly into the soil. Some people wait until the next year to add this. It’s pretty much up to you. After they are established any 6-10-10 fertilizer will work well.

Generally the iris borer is the biggest iris pest there is! You’ll see signs of borers beginning in May or June. You’ll see little holes in the leaves that will become larger as the borers grow and get hungrier. In order to keep these guys at bay, trim off any dead leaves in the early spring by tearing them right down to the rhizome. After the Iris have bloomed, you should cut off the leaves in the shape of a fan a couple of inches above the rhizome. This tends to help a good deal. Again, if there’s any sign of borers, put the leaves in the garbage, NOT the compost!

Be sure to keep these newly planted Iris gently and deeply watered. Once they are established their need for water is minimal.

Any other questions about Iris?

Friday, June 03, 2005

Chores for June!

Here they are...now you've got a month to accomplish at least one or two! :-)

JUNE

Plant your window boxes

Prune spring flowering shrubs when they have finished blooming

Thin seedlings

Use balanced, organic fertilizers around flowers

Stake tall perennials and tomatoes

Use a pine needle mulch for blueberries

Be sure your lawn mower is set to cut the grass HIGH

After the iris are done blooming they can be divided

Gladiolus corms can be planted

Dead-head (prune off) spent flowers from plants and shrubs

You may still plant container grown shrubs

Plant broccoli seed for fall harvest.

If you have a water garden, there's still time to plant water
lilies.

House plants can soon be moved outside to a shady, protected spot.

These same houseplants can be lightly fed with half strength
fertilizer.

Mulch perennials and roses to keep down weeds and conserve moisture.

Any annuals can be safely set out now.

If you have an amaryllis, now would be the time to move it outside.

Pinch the leading stems of your chrysanthemum's to encourage them to
be bushier and have more blossoms. Continue doing this every 6 inches
or so, as they grow.

If you have apple trees, hang red sticky-ball traps to control apple maggot flies. Small trees can get by with 2 balls. Larger trees should probably have 4-6 balls.

Stop cutting asparagus when the new spears get pinky-finger thin. Let them grow into ferns instead. It will feed the roots.

Any questions about June?

Thursday, June 02, 2005

The Bane of Every Gardener's Existance!

Bugs! They eat our plants and they eat us. It just isn't fair!
We can plant other plants that discourage insects from the garden. We can even pluck them right off and dump them in soapy water. There are plenty of solutions, even if they aren't always very successful. But even though we don't like the look of nibbled plants...unless something actually nibbles on US we're not too affected!
What DO we do to help ourselves and more important, our children from being vulnerable to insects in the garden? The children need to be outside. Heck, we need them to be outside! But by the same token, we don't want them to be bitten. What do we do to protect our children as well as ourselves? Here are some ideas that should help!
  • During particularly buggy seasons be sure to keep the children's skin covered by clothing. If you have to, tuck pants into socks and try to get long sleeves snug around the wrist.
  • Avoid wearing dark, and especially bright colors!
  • Avoid powders and ointments that might have an odor since the fragrances also attract insects.
  • ALWAYS use an insect repellent. Insect repellents that are safe to use on children include those with less than 10% Deet, or others with citronella or soybean oil.
  • Apply insect repellents to clothing instead of to skin. This way, there's no chance for it to be absorbed.
  • Wash off insect repellents as soon as you get back inside.
  • Follow the instructions, including age restrictions on any insect repellent you are considering using.
  • Avoid areas where insects nest.
  • Do daily tick checks of your child's body when he has a possible exposure, especially when camping or hiking, so as to prevent tick borne diseases, such as Lyme disease.
  • Remember that insect repellents do not protect against most stinging insects, including wasps, bees and fire ants.
  • Use window and door screens to prevent insects from getting inside your house.
  • Be sure to empty any standing water that might breed mosquitoes. You don't need to HELP them multiply!!!